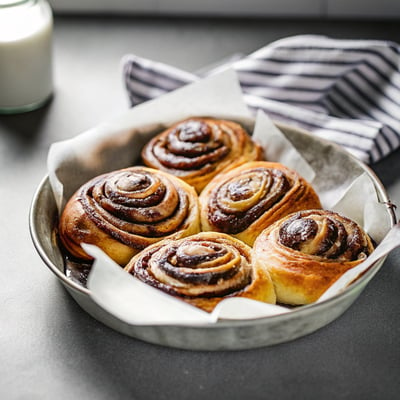
Chocolate Swirl Buns
Rating
0 out of 5 stars
(0)
Ingredients
12 muffin-sized buns
- Dough:
- 1/2 cup (120 ml) milk, preferably whole
- 1/4 cup (50 grams) plus a pinch of granulated sugar
- 1 1/2 teaspoons (5 grams) active dry yeast
- 1 large egg, brought to room temperature
- 2 cups (250 grams) all-purpose flour, plus more for work surface
- 1/2 teaspoon table salt
- 3 tablespoons (45 grams) unsalted butter, at room temperature, plus additional for bowl and muffin tins
- Filling:
- 3 tablespoons (45 grams) unsalted butter, at room temperature
- 1/4 cup (50 grams) granulated sugar
- 1/2 pound (225 grams) semisweet chocolate
- Pinch of salt
- 3/4 teaspoon ground cinnamon (optional)
- Egg wash (optional):
- 1 egg
- 2 teaspoons (10 ml) heavy cream or milk
How would you rate this recipe?
Preparation
Step 1
Prepare dough: Warm milk and a pinch of sugar to between 110 to 116°F. If you don’t have a thermometer, aim for warm but not hot to the touch; it’s best to err on the cool side. Sprinkle yeast over milk and let stand until foamy, about 5 minutes. In a small bowl, whisk together egg and remaining 1/4 cup sugar, then slowly whisk in yeast mixture.
Step 2
In a stand mixer fitted with the paddle attachment, combine flour and salt. Run mixer on low and add egg mixture, mixing until combined. Add butter and mix until incorporated. Switch mixer to dough hook and let it knead the dough for 10 minutes on low speed. At 10 minutes, it should be sticky and stringy but will firm up a bit after it rises. Butter a large bowl and place dough in it. Cover loosely with a lint-free towel or plastic wrap and let rise for 1 hour, or until doubled.
Step 3
Meanwhile, prepare the filling: If your chocolate is in large bars, roughly chop it. Then, you can let a food processor do the rest of the work, pulsing the chopped chocolate with the salt, sugar, and cinnamon (if using) until the chocolate is very finely chopped with some parts almost powdery. Add butter and pulse machine until it’s distributed throughout the chocolate. Set mixture aside.
Step 4
Generously butter a standard 12-muffin tin; set aside.
Step 5
Form buns: Once dough is doubled, turn it out onto a well-floured surface and gently deflate it with floured hands. Let it rest for another 5 minutes. Once rested, roll dough into a large rectangle. The short sides should be a scant 11 to 12 inches. The other side can be as long as you can roll it. The longer you can make it, the more dramatic and swirled your buns will be.
Step 6
Sprinkle the filling evenly over the dough’s surface. Tightly roll the dough back over the filling from one short end to the other, forming a 12 to 13-inch log. With a sharp serrated knife, gently saw 1-inch segments off the log and place each in a prepared muffin cup. Loosely cover buns with plastic wrap or a lint-free towel and let them rise for another 30 minutes.
Step 7
Preheat your oven to 350°F (180°C).
Step 8
Bake: If you’d like, you can egg wash your buns before baking them (whisk together an egg and the cream until smooth, brush over each bun top). Bake buns for 15 to 20 minutes, until puffed and brown. If you have an instant read thermometer, you can take the buns out when it reads 185 to 190 degrees in the middle of each bun.
Step 9
Set buns on a cooling rack. Cool them completely before unmolding them (with the aid of a knife or thin spatula to make sure nothing has stuck). Serve with iced coffee and a bowl of berries for nutritional balance.
Step 10
Save recipe for the next time?
Chef's notes
Updated Note 8/1/12:
Sometimes I will reread all 300+ comments weeks later and find a theme I’d missed when I only read them as they came in. In this case, I’ve noticed that a handful of people were finding that their buns were not puffy enough. I haven’t been able to retest these yet, but in the meanwhile, if you’re nervous or impatient, I believe little harm would come from bumping the yeast level up to 2 teaspoons or even 2 1/4 teaspoons, which would be a full standard envelope (1/4 ounce). You should then check your buns sooner; they might double the first time in 45 minutes instead of 1 hour. They might be puffy enough to bake at 25 minutes instead of 30 on the second rise (filled and in the pan).
Do ahead:
These buns can be formed, placed in the muffin cups and refrigerated (loosely covered with plastic, which you might want to oil to keep it from sticking) the night before, to bake in the morning. You can bake them directly from the fridge. They can be baked and frozen until needed, up to 1 month.