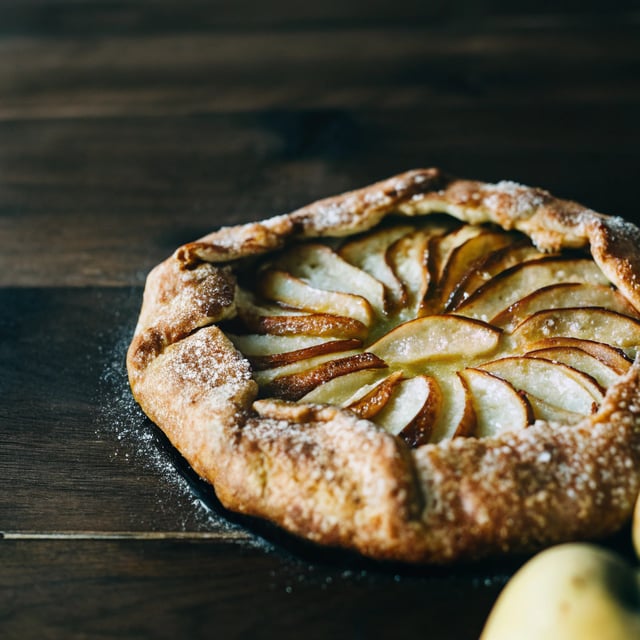
Easy Apple Galette

Total Time
2 hours, 10 minutes
Prep Time
1 hour, 20 minutes
Cook Time
35 minutes
Rating
4.8 out of 5 stars
(49)
Ingredients
1 galette; about 8 servings
- 1 and 1/2 cups (188g) all-purpose flour (spooned & leveled), plus more for work surface
- 2 Tablespoons (25g) granulated sugar
- 1/4 teaspoon salt
- 1/2 cup (8 Tbsp; 113g) cold unsalted butter, cubed
- 1/4 cup (60ml) ice-cold water, plus more as needed
- Egg wash: 1 large egg beaten with 1 Tablespoon (15ml) milk
- Optional: coarse sugar
- 3–4 apples, peeled and sliced into 1/4-inch slices (about 4–5 cups (500–600g) slices)
- 1/4 cup (50g) packed light or dark brown sugar
- 1 and 1/2 Tablespoons (12g) all-purpose flour
- 2 teaspoons fresh lemon juice
- 1 teaspoon ground cinnamon
- 1/4 teaspoon ground nutmeg
- Optional: salted caramel sauce
How would you rate this recipe?
Preparation
Step 1
Make the crust: Whisk the flour, sugar, and salt together in a medium bowl. Using a pastry cutter or 2 forks, cut in the butter until the mixture resembles coarse pea-sized crumbs. Add the water and stir until the flour is moistened. Add 1–2 more Tablespoons of water if the dough seems dry. Turn the dough out onto a lightly floured work surface and, using your hands, work the dough into a ball. Flatten it into a thick disc. Wrap the dough disc in plastic wrap or parchment paper and refrigerate it for at least 1 hour, and up to 3 days.
Step 2
As the dough chills, prepare the filling: Mix the apples, brown sugar, flour, lemon juice, cinnamon, and nutmeg together in a large bowl. Cover tightly and let sit until the dough is ready. I usually cover it and keep it in the refrigerator during this time.
Step 3
Line a large baking sheet with parchment paper or a silicone baking mat. Clear some shelf space in your refrigerator because the shaped galette must chill in step 6.
Step 4
On a lightly floured surface, roll the dough into a 12-inch circle—it doesn’t have to be perfect. Transfer dough to the prepared baking sheet.
Step 5
Arrange the apples (and any juices from the bottom of the bowl) into the center of the dough, leaving a 2–3-inch border all around them. You can simply spoon the filling on, or arrange the apple slices in a more deliberate design, such as concentric circles. Gently fold the edges of the dough over the filling, overlapping the dough as necessary. Press gently to seal the edges. Brush the crust edges generously with egg wash and sprinkle the crust with coarse sugar, if desired. If desired, drizzle 3 Tablespoons of salted caramel over the filling (not the crust).
Step 6
Refrigerate the shaped galette for at least 15–20 minutes as the oven preheats (next step), and up to 8 hours. If refrigerating for longer than 1–2 hours, cover it lightly. The galette will lose its shape if it’s not cold when it hits the oven.
Step 7
Preheat oven to 400°F (204°C).
Step 8
Bake until the filling is bubbly and the crust is golden brown, about 35–36 minutes. Remove from the oven and allow to cool on the baking sheet for 10 minutes before slicing and serving. If desired, serve with vanilla ice cream and more salted caramel sauce drizzled on top.
Step 9
Cover and store leftover galette in the refrigerator for up to 4 days.
Step 10
Save recipe for the next time?
Chef's notes
Make Ahead & Freezing Instructions:
Both the dough and filling can be made ahead of time and chilled in the refrigerator for up to 3 days. The dough can be frozen for up to 3 months after preparing it in step 1. Thaw overnight in the refrigerator before rolling out and filling.
Special Tools (affiliate links):
Glass Mixing Bowls, Pastry Cutter, Rubber Spatula, Baking Sheet, Silicone Baking Mat or Parchment Paper, Rolling Pin, Pastry Brush, Coarse Sugar Sprinkles
Butter:
Make sure your cubed butter is very cold. I like to chill it in the freezer for about 15 minutes ahead of time.
Apples:
You can use any apple variety, but here are my favorites for galettes
Chilling shaped galette before baking:
Chilling the shaped galette in the refrigerator in step 6 helps it maintain its shape in the oven. I usually refrigerate it for 15 minutes as the oven preheats. If your refrigerator doesn’t have room for your baking sheet, or you’re nervous about transferring a cold metal baking sheet to a hot oven (which can cause warping), try this