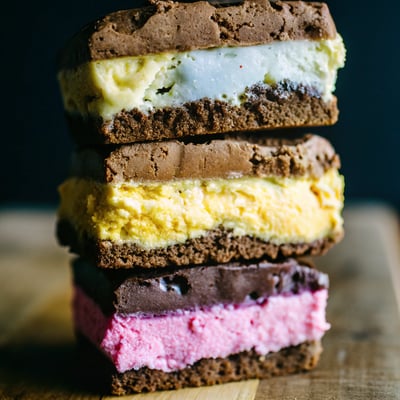
Ice Cream Cake
Total Time
1 day 1 hr
Prep Time
30 mins
Cook Time
30 mins
Rating
5 out of 5 stars
(10)
Ingredients
12 servings
- ½ recipe Vegan Chocolate Cake
- 1 pint Pistachio Gelato
- 1 pint Salted Caramel Ice Cream
- 1 pint Raspberry Sorbet
- 6 ounces fresh raspberries
How would you rate this recipe?
Preparation
Step 1
Preheat the oven to 350°F and grease a 9x5” loaf pan.
Step 2
Prepare the cake batter according to the directions in this post. Pour the batter into the prepared pan and bake for 18 to 22 minutes, or until a toothpick inserted comes out clean. Let cool completely. Run a knife around the edges of the pan and flip the pan over to remove the cake from the pan. If desired, use a serrated knife to slice off the domed part of the cake to create a flat surface for the next layer. Wash and dry the loaf pan, lightly grease it, and line the bottom and sides with parchment paper. Place the cake back into the pan. Freeze for at least 3 hours.
Step 3
When ready to add the first ice cream layer, allow the pint of ice cream to soften, then scoop into a bowl and stir until it’s evenly spreadable. Pour the softened ice cream onto the cake and use a spatula to smooth it. Freeze for 4 hours. Repeat with the remaining 2 ice cream layers, freezing 4 hours between each layer. Top the final layer with the raspberries and freeze overnight.
Step 4
When ready to serve, let the cake sit at room temperature for 5 minutes, then flip it over and bang it out onto a large baking sheet. Use a second baking sheet to flip the cake right side up. Slice and serve right away or freeze.
Step 5
Save recipe for the next time?
Chef's notes
*These are the ice creams we used:
Talenti Pistachio Gelato, 365 Brand Salted Caramel, and Talenti Raspberry Sorbet.
Remove the chocolate cake layer from the pan after baking for easier handling and lining.
For even stripes, slice off the top of the chocolate cake. This step is optional but recommended for a neat appearance.
Freeze each layer individually before adding the next to ensure clean layers.