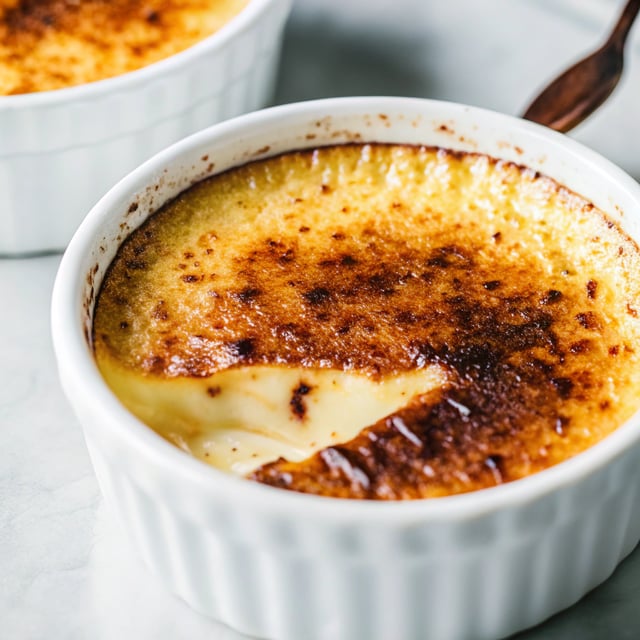
Salted Caramel Crème Brûlée

Total Time
1 hour
Prep Time
15 mins
Cook Time
45 mins
Rating
5 out of 5 stars
(1)
Ingredients
4 servings
- 2 cups heavy whipping cream
- 1/2 cup granulated white sugar, plus extra for topping
- 1/4 cup water
- 4 egg yolks
- 1 teaspoon pure vanilla extract
- 1/2 teaspoon fine sea salt
- flaky sea salt, for topping
How would you rate this recipe?
Preparation
Step 1
Prep oven and ramekins. Heat oven to 325°F. Place 4 (6-ounce) ramekins side by side in a large baking dish. Place a kettle of water on the heat to boil.
Step 2
Heat the cream and hot water. In a small saucepan over medium-low heat (or in the microwave), heat the cream until it is hot but not simmering, then set it aside. Place a kettle of water on the heat to boil.
Step 3
Caramelize the sugar. Add the sugar and water to a (separate) saucepan and stir to combine. Heat the mixture over medium-low heat, without stirring, until it caramelizes and reaches a deep amber color. Be patient with this process – the sugar will bubble for a while, then it will begin to progressively darken until it reaches a deep amber color or 355°F (180°C). At this point, remove the pan from the heat.
Step 4
Add the cream. Immediately pour the hot cream into the caramelized sugar with one hand, very slowly and carefully, while whisking the mixture with the other hand. The cream will bubble up quite dramatically, so please be careful.
Step 5
Temper the eggs. Add the egg yolks to a large heat-safe mixing bowl. While whisking the eggs with one hand, use your other hand to slowly add about 1/2 cup of the cream mixture to the eggs. Slowly add an additional 1/2 cup, then pour the remaining cream mixture into the eggs and whisk until combined. Add the vanilla and sea salt and whisk once more until combined.
Step 6
Strain. Strain the entire mixture through a fine mesh strainer into a clean bowl to catch and discard any clumps that might have accidentally scrambled.
Step 7
Fill the ramekins. Pour the mixture evenly into the ramekins so that they are nearly full. Pour the hot water from the kettle carefully into the baking dish surrounding the ramekins (avoid pouring water into the ramekins) until the water reaches halfway up the sides of the ramekins. (I actually find it’s easiest to add the dish to the oven and then carefully pour in the water, but either option will work.)
Step 8
Bake. Very carefully transfer the baking dish to the oven. Bake for 30 to 40 minutes, or until the custard is still slightly jiggly but the centers are barely set. (If you’d like to double-check doneness using a cooking thermometer, the centers of the custard should measure 170°F.)
Step 9
Cool. Very carefully remove the baking dish from the oven (remember that the water is very hot), then carefully remove the ramekins and transfer them to a wire rack. Let the ramekins cool to room temperature, then transfer them to the refrigerator and cool until completely chilled.
Step 10
Brûlée. Once the custard is chilled, remove the ramekins from the refrigerator. If you notice any condensation on the surface of the custards, blot it away gently with a paper towel. Add a thin layer of sugar on top of each custard, swirling it around so that the sugar is distributed evenly. (I used about 1 teaspoon per custard.) Use a kitchen torch to caramelize the top of each custard, holding the torch 2-3 inches from the top of the custard and very slowly moving the flame across the surface until it is a deep amber color and bubbly. Let the custard rest for at least one minute.
Step 11
Serve. Serve immediately, topped with a sprinkle of flaky sea salt, and enjoy!
Step 12
Save recipe for the next time?
Chef's notes
Don’t stir the caramel while it is cooking to prevent it from crystalizing and turning grainy.
Keep a close eye on the caramel as it can darken quickly.
Add the water bath after the pan is in the oven for easier handling.
Don’t over-bake the custards; they should still be wobbly when jiggled.
Brûlée the topping just before serving for best texture.