Layered Chai Spiced Scones
Total Time
1 hour 20 minutes
Prep Time
30 minutes
Cook Time
30 minutes
Rating
5 out of 5 stars
(2)
Ingredients
8 scones
- 3 cups (385g) all-purpose flour
- 1/4 cup (50g) granulated sugar
- 1/4 cup (50g) light brown sugar, packed
- 1/2 tsp kosher salt
- 1 tbsp baking powder
- 1/4 tsp baking soda
- 2 tsp ground cinnamon
- 1/2 cup (108g) lard, cold
- 1/4 cup (55g) unsalted butter, cold
- 2/3 cup (160g) heavy cream + 2 tbsp, cold
- 1/4 cup (30g) pumpkin puree
- 1 large egg
- 2 tsp vanilla extract
- Raw sugar, for topping
- 2 tbsp light brown sugar
- 2 tsp ground cinnamon
- 2 tsp ground cardamom
- 1 tsp ground ginger
- 1/4 tsp ground cloves
- 1/4 tsp ground nutmeg
- 1 cup (105g) powdered sugar
- 2 tbsp maple syrup
- 3 tbsp heavy cream
How would you rate this recipe?
Preparation
Step 1
In a large bowl, whisk together the flour, sugar, brown sugar, salt, baking powder, baking soda, and cinnamon.
Step 2
Drop in spoonfuls of the lard and use a cheese grater to grate in the butter.
Step 3
Use your hands to work the fat into the dry ingredients, creating small pea-sized lumps throughout.
Step 4
In a measuring glass, beat together the cream, pumpkin, egg, and vanilla.
Step 5
Pour the mixture into the dry ingredients and mix to combine. Near the end, you may need to work the dough together with your hands to incorporate the last bit of flour.
Step 6
Place the bowl in the refrigerator.
Step 7
In a small dish, combine all of the chai spice ingredients.
Step 8
Lightly flour your work surface and place the scone dough on top. Pat the dough into an 8×12 rectangle and top with a layer of the spice blend.
Step 9
Pat in the spices and fold the dough in half like a book (from left to right).
Step 10
Top that half with another layer of spices and fold in half again (from top to bottom).
Step 11
Move the dough back to the center of your work surface and repeat this process. Pat into an 8×12 rectangle, top with spices, fold, top with spices, fold.
Step 12
With your lump of dough, lightly flour your work surface again and place the dough in the center. Pat into a 6×9 rectangle and cut off the edges to create a perfect rectangle shape.
Step 13
Cut the rectangle into 8 scones and place onto a plate or small dish lined with parchment paper.
Step 14
Transfer the scones to the freezer while you preheat the oven to 375°F.
Step 15
Once the oven is preheated, transfer the scones to a large baking sheet lined with parchment paper. Make sure the scones are spaced about 2 inches apart.
Step 16
Brush the tops with the extra 2 tablespoons of heavy cream and sprinkle with a layer of raw sugar.
Step 17
Bake for 18-20 minutes or until well puffed with golden edges.
Step 18
Allow to cool for about 30 minutes, then make the icing.
Step 19
Whisk all of the icing ingredients together to form a thick but drippy icing.
Step 20
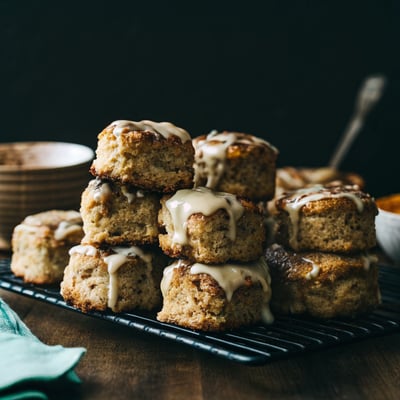
Spread on top of the scones and enjoy!
Step 21
Save recipe for the next time?
Chef's notes
Measuring Flour – I always recommend weighing ingredients if you have a scale. Otherwise, spoon the flour into a measuring cup and level it off for light and fluffy cups.
Mixing – When mixing in the flour, be careful not to overwork the dough. Near the end, you will need to mix in the flour by hand but do not knead the dough as if it were bread. Instead, fold and pat it together just until combined.
Temperature – It’s important that the scone dough stays as cold as possible to help create tender layers. While you’re not working with the dough, store in the refrigerator. This is also why the scones are frozen before baking!
Folding – The layering process can seem a bit confusing, but the photos below should help! It’s essentially a series of steps where the dough is patted out, covered in spices, folded in half, covered in spices, folded in half again, and the process repeats.
Baking – It’s hard to tell when scones are done because they will still feel very soft in the middle. But look for slightly golden edges and an overall surface dry appearance. The softness in the center will set as they cool.