Danish Pastries
Total Time
5 hrs 45 mins
Prep Time
3 hrs 30 mins
Cook Time
15 mins
Rating
4.74 out of 5 stars
(148)
Ingredients
36 danishes
- 2 cups (454 g) unsalted butter, divided
- 5½ cups (663 g) all-purpose flour
- ½ cup (99 g) granulated sugar
- 4½ teaspoons instant yeast
- 2 teaspoons salt
- 2 teaspoons vanilla extract
- 1½ cups (360 ml) milk
- 2 eggs
- 8 ounces cream cheese, at room temperature
- 3 tablespoons granulated sugar
- 1 egg
- ¼ teaspoon salt
- 1 cup fruit jam, preserves, or canned pie filling
- 1 egg white
- 1 tablespoon water
- 1½ cups (170 g) powdered sugar
- 2 tablespoons milk
How would you rate this recipe?
Preparation
Step 1
Make the Dough: Cut ½ tablespoon off the ends of each of the four sticks of butter (for a total of 2 tablespoons).
Step 2
In the bowl of a stand mixer, whisk together the flour, sugar, yeast, and salt. Add the 2 tablespoons cold butter and work it in with a pastry blender or your fingers until no large lumps remain. Add the vanilla, milk, and eggs.
Step 3
Mix with the paddle attachment on low speed until a dough begins to form, then switch to the dough hook and knead until a cohesive, but quite sticky dough forms, about 5 to 7 minutes. The dough won't completely clean the bowl and will stick a bit at the bottom. (You can also complete this step in a bread machine on the dough cycle.)
Step 4
Scrape the dough into a ball, and transfer it to a floured work surface. Cover it with plastic wrap, and let it rest for 10 minutes while you prepare the butter.
Step 5
Make the Butter Block: Cut each stick of butter in half lengthwise, to make 8 long rectangles. On a piece of floured parchment or plastic wrap, line up 4 of the butter pieces side by side, to form a rectangle. Sprinkle lightly with flour, and cover with another piece of parchment or plastic wrap.
Step 6
Gently pound and roll the butter until it's about 6" x 9". The pieces may or may not meld together.
Step 7
Repeat with the remaining 4 pieces of butter. You should now have two butter rectangles, about 6" x 9" each.
Step 8
Laminate the Dough: Roll the dough into a rectangle 12" wide x 24" long. Place one of the butter pieces onto the center third of the dough. Fold one side over the butter to cover it. Place the other butter piece atop the folded-over dough, and fold the remaining dough up over it. Pinch the open ends and side closed.
Step 9
Turn the dough so a 12" side is closest to you. Roll the dough into a 10" x 24" rectangle. Fold each side into the center; then fold one side over the other to make a rectangular packet about 6" x 10".
Step 10
Dust the surface of the dough with flour, wrap it in plastic wrap, and chill in the refrigerator for 20 minutes.
Step 11
Remove the dough from the refrigerator, and again roll it into a rectangle about 10" x 24". Fold it into a packet as you did in step #9; it'll be about 7" x 12". Roll one final time, fold into a packet, and flour the dough lightly. Wrap loosely (but completely) in plastic, and chill it for at least 2 hours, or up to 16 hours.
Step 12
Make the Cheese Filling (if using): Combine all of the ingredients in a medium bowl, stirring until smooth.
Step 13
Assemble the Pastries: When you're ready to make pastries, remove the dough from the refrigerator, unwrap it, and cut off one-third. You'll work with this piece first; re-wrap and return the remainder to the refrigerator.
Step 14
Divide the dough into 12 pieces. Roll each into a smooth ball, then flatten the balls into 3" to 3 1/2" rounds, making the center thinner than the edges. You want to build up a slight wall of dough all around the circumference; this will help hold the filling. Place the rounds on a baking sheet lined with parchment paper or a silicone baking mat.
Step 15
Working with one-half of the remaining dough at a time, repeat the process; you'll finish with three baking sheets, each with 12 dough rounds.
Step 16
Cover the Danish lightly with greased plastic wrap, and let them rise for about 1 hour; they'll become slightly puffy. Towards the end of the rising time, preheat the oven to 400°F.
Step 17
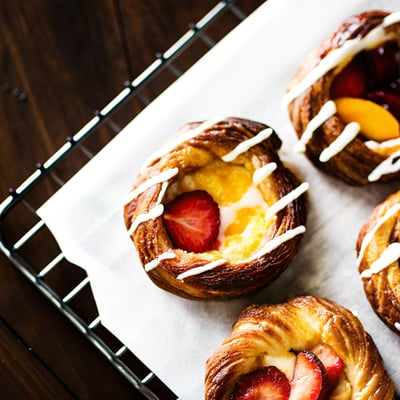
Use your fingers to press the centers of the dough rounds as flat as possible, leaving the "sidewalls" puffed. Spoon a heaping teaspoon of filling into the well of each round.
Step 18
Make the Egg Wash: In a small bowl, whisk together the egg white and water. Brush the exposed edges of the pastries with the egg wash.
Step 19
Bake the Pastries: Bake the pastries, one pan at a time, until golden brown, 15 to 18 minutes. Remove them from the oven, and transfer to a wire rack to cool.
Step 20
Make the Glaze: In a small bowl, whisk the powdered sugar and milk to make a "drizzlable" glaze. If the glaze is too thick, add just a splash more milk at a time until the correct consistency is reached.
Step 21
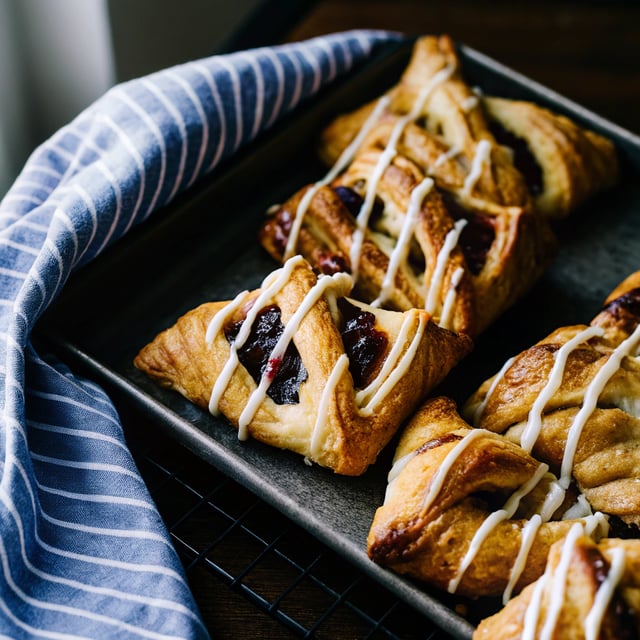
Drizzle the glaze atop the pastries. Serve warm or at room temperature.
Step 22
Save recipe for the next time?
Chef's notes
When you make the butter block, be sure that your butter is on the cool side or it will be too warm to work into the dough. If it seems too soft when you start working with it, just pop it into the refrigerator to firm up before continuing with the recipe. Or, get it rolled into your rectangle then refrigerate your butter block rectangle until it firms up a bit before laminating the dough.
You can tackle this recipe all in one day, or split it up into a more manageable two-day project. Simply leave the laminated dough in the refrigerator overnight and continue with the shaping and baking the next day.
Feel free to experiment with different shapes if you’d like, but as I mentioned above, I had the most consistent success with these circular Danishes.
These are best enjoyed the same day they are made for optimal flakiness and freshness, however, they will keep in an airtight container at room temperature or in the refrigerator for up to 3 days.
Freezing the Dough:
If you’d like to freeze all or part of the Danish pastry dough, you can do so after Step #11. Refrigerate for at least 2 hours, then wrap the portion you want to freeze in two layers of plastic wrap, place in a freezer-safe zip-top bag and freeze for up to 3 months. Thaw the dough overnight in the refrigerator, then proceed with the recipe as written.
Freezing Assembled Pastries:
To assemble the pastries and freeze before baking, complete the recipe through Step #17 (filling the pastries). Then, place on a baking sheet in a single layer and place in the freezer until they are completely frozen, at least 3 hours. Transfer the pastries to an airtight container or resealable freezer bag and freeze for up to 1 month. Bake from frozen (don’t forget the egg wash!), adding an extra 10 to 15 minutes to the bake time.
Freezing Baked Pastries:
To freeze already-baked Danish pastries, allow them to cool completely to room temperature, then wrap tightly in plastic wrap and place in an airtight container and freeze for up to 3 months. Thaw in the refrigerator overnight, then reheat in a 350-degree oven for 8 to 10 minutes, or until warmed through.